NEWS
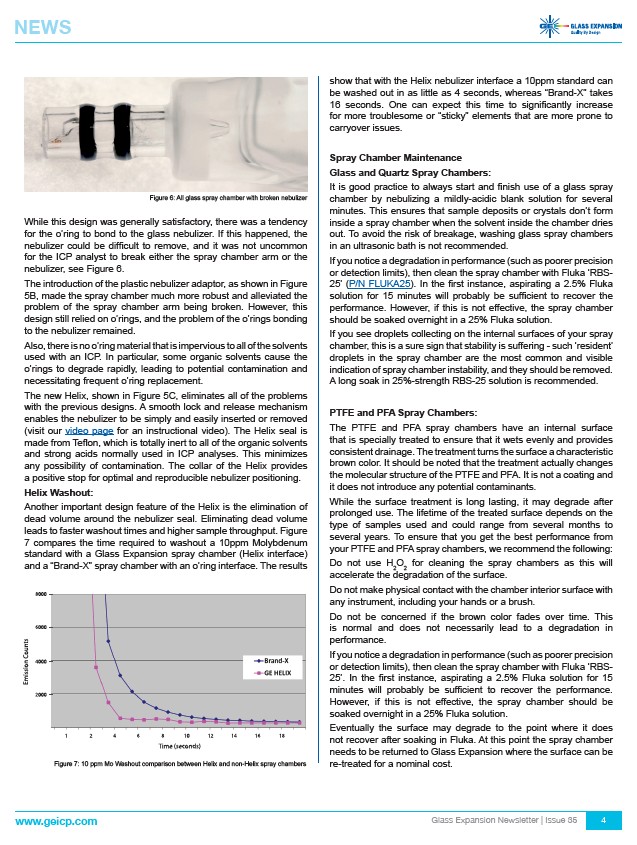
Figure 6: All glass spray chamber with broken nebulizer
While this design was generally satisfactory, there was a tendency
for the o’ring to bond to the glass nebulizer. If this happened, the
nebulizer could be difficult to remove, and it was not uncommon
for the ICP analyst to break either the spray chamber arm or the
nebulizer, see Figure 6.
The introduction of the plastic nebulizer adaptor, as shown in Figure
5B, made the spray chamber much more robust and alleviated the
problem of the spray chamber arm being broken. However, this
design still relied on o’rings, and the problem of the o’rings bonding
to the nebulizer remained.
Also, there is no o’ring material that is impervious to all of the solvents
used with an ICP. In particular, some organic solvents cause the
o’rings to degrade rapidly, leading to potential contamination and
necessitating frequent o’ring replacement.
The new Helix, shown in Figure 5C, eliminates all of the problems
with the previous designs. A smooth lock and release mechanism
enables the nebulizer to be simply and easily inserted or removed
(visit our video page for an instructional video). The Helix seal is
made from Teflon, which is totally inert to all of the organic solvents
and strong acids normally used in ICP analyses. This minimizes
any possibility of contamination. The collar of the Helix provides
a positive stop for optimal and reproducible nebulizer positioning.
Helix Washout:
Another important design feature of the Helix is the elimination of
dead volume around the nebulizer seal. Eliminating dead volume
leads to faster washout times and higher sample throughput. Figure
7 compares the time required to washout a 10ppm Molybdenum
standard with a Glass Expansion spray chamber (Helix interface)
and a “Brand-X” spray chamber with an o’ring interface. The results
show that with the Helix nebulizer interface a 10ppm standard can
be washed out in as little as 4 seconds, whereas “Brand-X” takes
16 seconds. One can expect this time to significantly increase
for more troublesome or “sticky” elements that are more prone to
carryover issues.
Spray Chamber Maintenance
Glass and Quartz Spray Chambers:
It is good practice to always start and finish use of a glass spray
chamber by nebulizing a mildly-acidic blank solution for several
minutes. This ensures that sample deposits or crystals don’t form
inside a spray chamber when the solvent inside the chamber dries
out. To avoid the risk of breakage, washing glass spray chambers
in an ultrasonic bath is not recommended.
If you notice a degradation in performance (such as poorer precision
or detection limits), then clean the spray chamber with Fluka ‘RBS-
25’ (P/N FLUKA25). In the first instance, aspirating a 2.5% Fluka
solution for 15 minutes will probably be sufficient to recover the
performance. However, if this is not effective, the spray chamber
should be soaked overnight in a 25% Fluka solution.
If you see droplets collecting on the internal surfaces of your spray
chamber, this is a sure sign that stability is suffering - such ‘resident’
droplets in the spray chamber are the most common and visible
indication of spray chamber instability, and they should be removed.
A long soak in 25%-strength RBS-25 solution is recommended.
PTFE and PFA Spray Chambers:
The PTFE and PFA spray chambers have an internal surface
that is specially treated to ensure that it wets evenly and provides
consistent drainage. The treatment turns the surface a characteristic
brown color. It should be noted that the treatment actually changes
the molecular structure of the PTFE and PFA. It is not a coating and
it does not introduce any potential contaminants.
While the surface treatment is long lasting, it may degrade after
prolonged use. The lifetime of the treated surface depends on the
type of samples used and could range from several months to
several years. To ensure that you get the best performance from
your PTFE and PFA spray chambers, we recommend the following:
Do not use H2O2 for cleaning the spray chambers as this will
accelerate the degradation of the surface.
Do not make physical contact with the chamber interior surface with
any instrument, including your hands or a brush.
Do not be concerned if the brown color fades over time. This
is normal and does not necessarily lead to a degradation in
performance.
If you notice a degradation in performance (such as poorer precision
or detection limits), then clean the spray chamber with Fluka ‘RBS-
25’. In the first instance, aspirating a 2.5% Fluka solution for 15
minutes will probably be sufficient to recover the performance.
However, if this is not effective, the spray chamber should be
soaked overnight in a 25% Fluka solution.
Eventually the surface may degrade to the point where it does
not recover after soaking in Fluka. At this point the spray chamber
needs to be returned to Glass Expansion where the surface can be
Figure 7: 10 ppm Mo Washout comparison between Helix and non-Helix spray chambers re-treated for a nominal cost.
www.geicp.com Glass Expansion Newsletter | Issue 35 4
/www.geicp.com
/wrapper.pl?c1=News_videos
/wrapper.pl?c1=Showpart&partno=FLUKA25